
TL;DR
As the saying goes, there are several ways to skin a cat...in the tech world, there are 5 ways to skin a Lambda Function 🤩
Let's Compare 5 DevTools
Introduction
As developers try to bridge the gap between development and DevOps, I thought it would be helpful to compare Programming Languages and DevTools.
Let's start with the idea of a simple function that would upload a text file to a Bucket in our cloud app.
The next step is to demonstrate several ways this could be accomplished.
Note: In cloud development, managing permissions and bucket identities, packaging runtime code, and handling multiple files for infrastructure and runtime add layers of complexity to the development process.

Let's dive into some code!
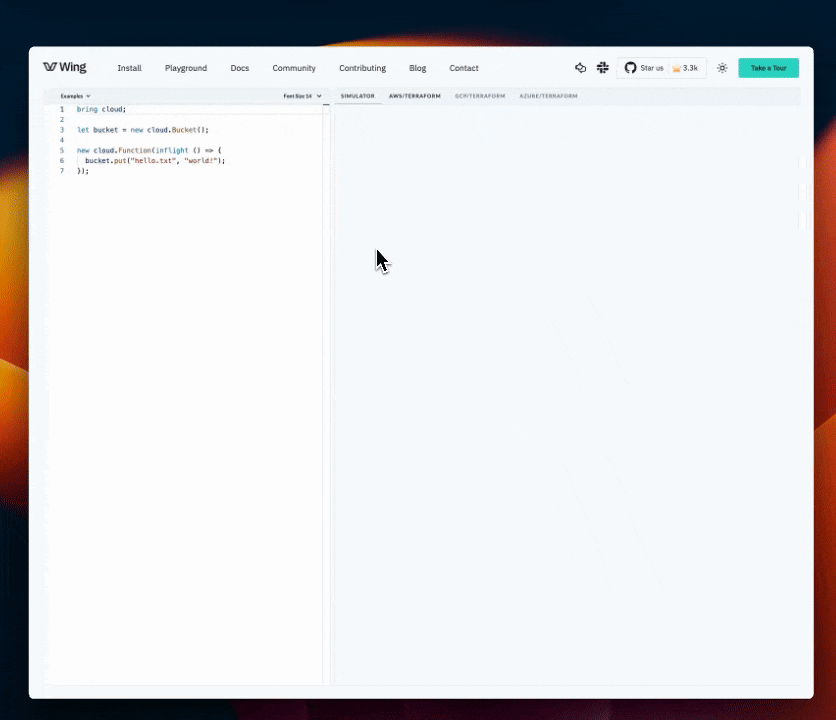
1. Wing
After installing Wing, let's create a file:
main.wIf you aren't familiar with the Wing Programming Language, please check out the open-source repo HERE
bring cloud;

let bucket = new cloud.Bucket();

new cloud.Function(inflight () => {
  bucket.put("hello.txt", "world!");
});
Let's do a breakdown of what's happening in the code above.
bring cloudis Wing's import syntaxCreate a Cloud Bucket:
let bucket = new cloud.Bucket();initializes a new cloud bucket instance.On the backend, the Wing platform provisions a new bucket in your cloud provider's environment. This bucket is used for storing and retrieving data.
Create a Cloud Function: The
new cloud.Function(inflight () => { ... });statement defines a new cloud function.This function, when triggered, performs the actions defined within its body.
bucket.put("hello.txt", "world!");uploads a file named hello.txt with the content world! to the cloud bucket created earlier.
Compile & Deploy to AWS
wing compile --platform tf-aws main.wterraform apply
That's it, Wing takes care of the complexity of (permissions, getting the bucket identity in the runtime code, packaging the runtime code into a bucket, having to write multiple files - for infrastructure and runtime), etc.
Not to mention it generates IAC (TF or CF), plus Javascript that you can deploy with existing tools.
But while you develop, you can use the local simulator to get instant feedback and shorten the iteration cycles.
Wing even has a playground that you can try out in the browser!
2. Pulumi
Step 1: Initialize a New Pulumi Project
mkdir pulumi-s3-lambda-ts
cd pulumi-s3-lambda-ts
pulumi new aws-typescript
Step 2. Write the code to upload a text file to S3.
This will be your project structure.
pulumi-s3-lambda-ts/
├─ src/
│  ├─ index.ts              # Pulumi infrastructure code
│  └─ lambda/
│     └─ index.ts           # Lambda function code to upload a file to S3
├─ tsconfig.json            # TypeScript configuration
└─ package.json             # Node.js project file with dependencies
Let's add this code to index.ts
import * as pulumi from "@pulumi/pulumi";
import * as aws from "@pulumi/aws";

// Create an AWS S3 bucket
const bucket = new aws.s3.Bucket("myBucket", {
    acl: "private",
});

// IAM role for the Lambda function
const lambdaRole = new aws.iam.Role("lambdaRole", {
    assumeRolePolicy: JSON.stringify({
        Version: "2023-10-17",
        Statement: [{
            Action: "sts:AssumeRole",
            Principal: {
                Service: "lambda.amazonaws.com",
            },
            Effect: "Allow",
            Sid: "",
        }],
    }),
});

// Attach the AWSLambdaBasicExecutionRole policy
new aws.iam.RolePolicyAttachment("lambdaExecutionRole", {
    role: lambdaRole,
    policyArn: aws.iam.ManagedPolicy.AWSLambdaBasicExecutionRole,
});

// Policy to allow Lambda function to access the S3 bucket
const lambdaS3Policy = new aws.iam.Policy("lambdaS3Policy", {
    policy: bucket.arn.apply(arn => JSON.stringify({
        Version: "2023-10-17",
        Statement: [{
            Action: ["s3:PutObject", "s3:GetObject"],
            Resource: `${arn}/*`,
            Effect: "Allow",
        }],
    })),
});

// Attach policy to Lambda role
new aws.iam.RolePolicyAttachment("lambdaS3PolicyAttachment", {
    role: lambdaRole,
    policyArn: lambdaS3Policy.arn,
});

// Lambda function
const lambda = new aws.lambda.Function("myLambda", {
    code: new pulumi.asset.AssetArchive({
        ".": new pulumi.asset.FileArchive("./src/lambda"),
    }),
    runtime: aws.lambda.Runtime.NodeJS12dX,
    role: lambdaRole.arn,
    handler: "index.handler",
    environment: {
        variables: {
            BUCKET_NAME: bucket.bucket,
        },
    },
});

export const bucketName = bucket.id;
export const lambdaArn = lambda.arn;
Next, create a lambda/index.ts directory for the Lambda function code:
import { S3 } from "aws-sdk";

const s3 = new S3();

export const handler = async (): Promise<void> => {
    const bucketName = process.env.BUCKET_NAME || "";
    const fileName = "example.txt";
    const content = "Hello, Pulumi!";

    const params = {
        Bucket: bucketName,
        Key: fileName,
        Body: content,
    };

    try {
        await s3.putObject(params).promise();
        console.log(`File uploaded successfully at https://${bucketName}.s3.amazonaws.com/${fileName}`);
    } catch (err) {
        console.log(err);
    }
};
Step 3: TypeScript Configuration (tsconfig.json)
{
  "compilerOptions": {
    "target": "ES2018",
    "module": "CommonJS",
    "strict": true,
    "esModuleInterop": true,
    "skipLibCheck": true,
    "forceConsistentCasingInFileNames": true
  },
  "include": ["src/**/*.ts"],
  "exclude": ["node_modules", "**/*.spec.ts"]
}
After creating a Pulumi project, a yaml file will automatically be generated. pulumi.yaml
name: s3-lambda-pulumi
runtime: nodejs
description: A simple example that uploads a file to an S3 bucket using a Lambda function
template:
  config:
    aws:region:
      description: The AWS region to deploy into
      default: us-west-2
Deploy with Pulumi
Ensure your lambda directory with the index.js file is correctly set up. Then, run the following command to deploy your infrastructure: pulumi up
3. AWS-CDK
Step 1: Initialize a New CDK Project
mkdir cdk-s3-lambda
cd cdk-s3-lambda
cdk init app --language=typescript
Step 2: Add Dependencies
npm install @aws-cdk/aws-lambda @aws-cdk/aws-s3
Step 3: Define the AWS Resources in CDK
File: index.js
import * as cdk from '@aws-cdk/core';
import * as lambda from '@aws-cdk/aws-lambda';
import * as s3 from '@aws-cdk/aws-s3';

export class CdkS3LambdaStack extends cdk.Stack {
  constructor(scope: cdk.Construct, id: string, props?: cdk.StackProps) {
    super(scope, id, props);

    // Create the S3 bucket
    const bucket = new s3.Bucket(this, 'MyBucket', {
      removalPolicy: cdk.RemovalPolicy.DESTROY, // NOT recommended for production code
    });

    // Define the Lambda function
    const lambdaFunction = new lambda.Function(this, 'MyLambda', {
      runtime: lambda.Runtime.NODEJS_14_X, // Define the runtime
      handler: 'index.handler', // Specifies the entry point
      code: lambda.Code.fromAsset('lambda'), // Directory containing your Lambda code
      environment: {
        BUCKET_NAME: bucket.bucketName,
      },
    });

    // Grant the Lambda function permissions to write to the S3 bucket
    bucket.grantWrite(lambdaFunction);
  }
}
Step 4: Lambda Function Code
Create the same file struct as above and in the pulumi directory: index.ts
import { S3 } from 'aws-sdk';
const s3 = new S3();

exports.handler = async (event: any) => {
  const bucketName = process.env.BUCKET_NAME;
  const fileName = 'uploaded_file.txt';
  const content = 'Hello, CDK! This file was uploaded by a Lambda function!';

  try {
    const result = await s3.putObject({
      Bucket: bucketName!,
      Key: fileName,
      Body: content,
    }).promise();

    console.log(`File uploaded successfully: ${result}`);
    return {
      statusCode: 200,
      body: `File uploaded successfully: ${fileName}`,
    };
  } catch (error) {
    console.log(error);
    return {
      statusCode: 500,
      body: `Failed to upload file: ${error}`,
    };
  }
};
Deploy the CDK Stack
First, compile your TypeScript code: npm run build, then
Deploy your CDK to AWS: cdk deploy
4. CDK for Terraform
Step 1: Initialize a New CDKTF Project
mkdir cdktf-s3-lambda-ts
cd cdktf-s3-lambda-ts
Then, initialize a new CDKTF project using TypeScript:
cdktf init --template="typescript" --local
Step 2: Install AWS Provider and Add Dependencies
npm install @cdktf/provider-aws
Step 3: Define the Infrastructure
Edit main.ts to define the S3 bucket and Lambda function:
import { Construct } from 'constructs';
import { App, TerraformStack } from 'cdktf';
import { AwsProvider, s3, lambdafunction, iam } from '@cdktf/provider-aws';

class MyStack extends TerraformStack {
  constructor(scope: Construct, id: string) {
    super(scope, id);

    new AwsProvider(this, 'aws', { region: 'us-west-2' });

    // S3 bucket
    const bucket = new s3.S3Bucket(this, 'lambdaBucket', {
      bucketPrefix: 'cdktf-lambda-'
    });

    // IAM role for Lambda
    const role = new iam.IamRole(this, 'lambdaRole', {
      name: 'lambda_execution_role',
      assumeRolePolicy: JSON.stringify({
        Version: '2023-10-17',
        Statement: [{
          Action: 'sts:AssumeRole',
          Principal: { Service: 'lambda.amazonaws.com' },
          Effect: 'Allow',
        }],
      }),
    });

    new iam.IamRolePolicyAttachment(this, 'lambdaPolicy', {
      role: role.name,
      policyArn: 'arn:aws:iam::aws:policy/service-role/AWSLambdaBasicExecutionRole',
    });

    const lambdaFunction = new lambdafunction.LambdaFunction(this, 'MyLambda', {
      functionName: 'myLambdaFunction',
      handler: 'index.handler',
      role: role.arn,
      runtime: 'nodejs14.x',
      s3Bucket: bucket.bucket, // Assuming the Lambda code is uploaded to this bucket
      s3Key: 'lambda.zip', // Assuming the Lambda code zip file is named lambda.zip
      environment: {
        variables: {
          BUCKET_NAME: bucket.bucket,
        },
      },
    });

    // Grant the Lambda function permissions to write to the S3 bucket
    new s3.S3BucketPolicy(this, 'BucketPolicy', {
      bucket: bucket.bucket,
      policy: bucket.bucket.apply(name => JSON.stringify({
        Version: '2023-10-17',
        Statement: [{
          Action: 's3:*',
          Resource: `arn:aws:s3:::${name}/*`,
          Effect: 'Allow',
          Principal: {
            AWS: role.arn,
          },
        }],
      })),
    });
  }
}

const app = new App();
new MyStack(app, 'cdktf-s3-lambda-ts');
app.synth();
Step 4: Lambda Function Code
The Lambda function code should be written in TypeScript and compiled into JavaScript, as AWS Lambda natively executes JavaScript. Here's an example index.ts for the Lambda function that you need to compile and zip:
import { S3 } from 'aws-sdk';

const s3 = new S3();

exports.handler = async () => {
  const bucketName = process.env.BUCKET_NAME || '';
  const content = 'Hello, CDKTF!';
  const params = {
    Bucket: bucketName,
    Key: `upload-${Date.now()}.txt`,
    Body: content,
  };

  try {
    await s3.putObject(params).promise();
    return { statusCode: 200, body: 'File uploaded successfully' };
  } catch (err) {
    console.error(err);
    return { statusCode: 500, body: 'Failed to upload file' };
  }
};
You need to compile this TypeScript code to JavaScript, zip it, and upload it to the S3 bucket manually or using a script.
Ensure the s3Key in the LambdaFunction resource points to the correct zip file in the bucket.
Compile & Deploy Your CDKTF Project
Compile your project using npm run build
Generate Terraform Configuration Files
Run the cdktf synth command. This command executes your CDKTF app, which generates Terraform configuration files (*.tf.json files) in the cdktf.out directory:
Deploy Your Infrastructure
cdktf deploy
5. Terraform
Step 1: Terraform Setup
Define your AWS Provider and S3 Bucket
Create a file named main.tf with the following:
provider "aws" {
  region = "us-west-2" # Choose your AWS region
}

resource "aws_s3_bucket" "lambda_bucket" {
  bucket_prefix = "lambda-upload-bucket-"
  acl           = "private"
}

resource "aws_iam_role" "lambda_execution_role" {
  name = "lambda_execution_role"

  assume_role_policy = jsonencode({
    Version = "2023-10-17"
    Statement = [
      {
        Action = "sts:AssumeRole"
        Effect = "Allow"
        Principal = {
          Service = "lambda.amazonaws.com"
        }
      },
    ]
  })
}

resource "aws_iam_policy" "lambda_s3_policy" {
  name        = "lambda_s3_policy"
  description = "IAM policy for Lambda to access S3"

  policy = jsonencode({
    Version = "2023-10-17"
    Statement = [
      {
        Action   = ["s3:PutObject", "s3:GetObject"],
        Effect   = "Allow",
        Resource = "${aws_s3_bucket.lambda_bucket.arn}/*"
      },
    ]
  })
}

resource "aws_iam_role_policy_attachment" "lambda_s3_access" {
  role       = aws_iam_role.lambda_execution_role.name
  policy_arn = aws_iam_policy.lambda_s3_policy.arn
}

resource "aws_lambda_function" "uploader_lambda" {
  function_name = "S3Uploader"

  s3_bucket = "YOUR_DEPLOYMENT_BUCKET_NAME" # Set your deployment bucket name here
  s3_key    = "lambda.zip" # Upload your ZIP file to S3 and set its key here

  handler = "index.handler"
  role    = aws_iam_role.lambda_execution_role.arn
  runtime = "nodejs14.x"

  environment {
    variables = {
      BUCKET_NAME = aws_s3_bucket.lambda_bucket.bucket
    }
  }
}
Step 2: Lambda Function Code (TypeScript)
Create a TypeScript file index.ts for the Lambda function:
import { S3 } from 'aws-sdk';

const s3 = new S3();

exports.handler = async (event: any) => {
  const bucketName = process.env.BUCKET_NAME;
  const fileName = `uploaded-${Date.now()}.txt`;
  const content = 'Hello, Terraform and AWS Lambda!';

  try {
    await s3.putObject({
      Bucket: bucketName!,
      Key: fileName,
      Body: content,
    }).promise();

    console.log('Upload successful');
    return {
      statusCode: 200,
      body: JSON.stringify({ message: 'Upload successful' }),
    };
  } catch (error) {
    console.error('Upload failed:', error);
    return {
      statusCode: 500,
      body: JSON.stringify({ message: 'Upload failed' }),
    };
  }
};
Deploy
Finally after uploading your Lambda function code to the specified S3 bucket, run terraform apply.
I hope you enjoyed this comparison of five simple ways to write a function in our cloud app that uploads a text file to a Bucket.
As you can see, most of the code becomes very complex, except for one.
Rapping it up!

Click on the picture ⬆️
If you are intrigued about Wing and like how we are simplifying the process of cloud development, please give us a ⭐ star.


